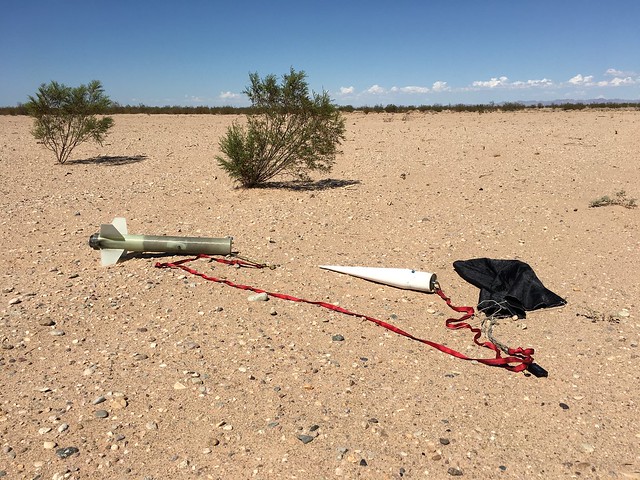
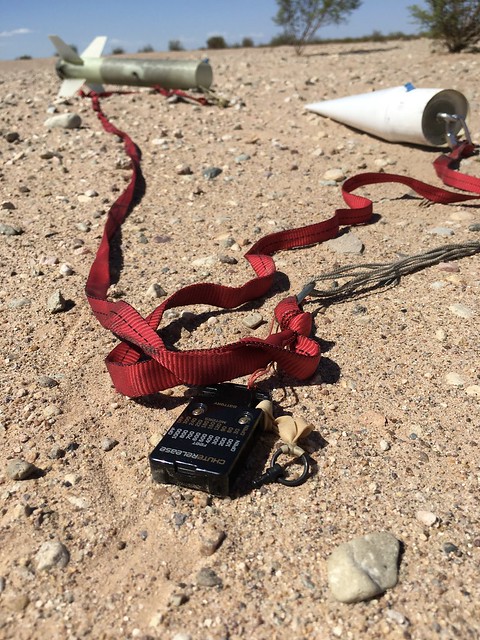
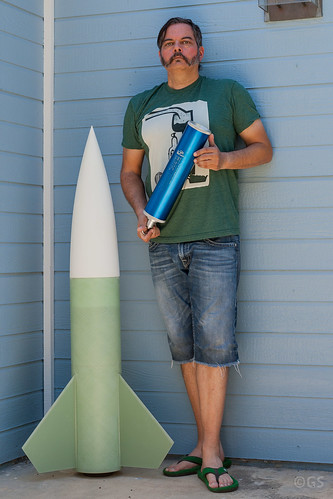
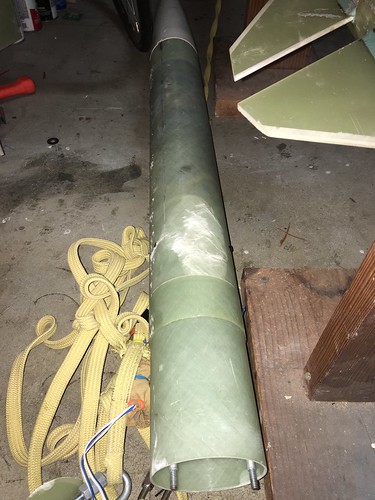
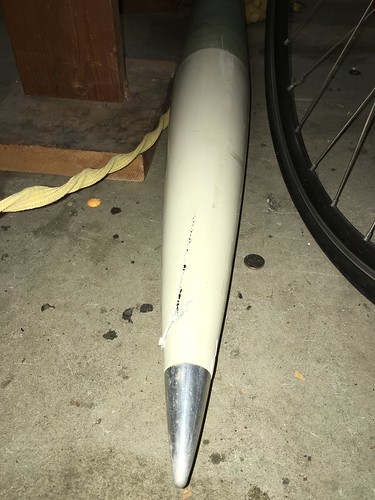
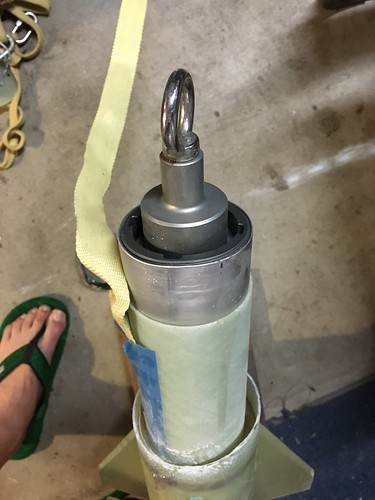
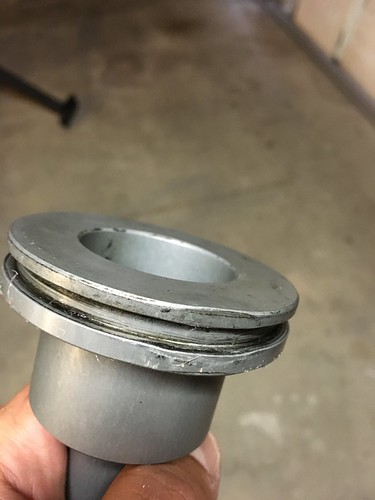
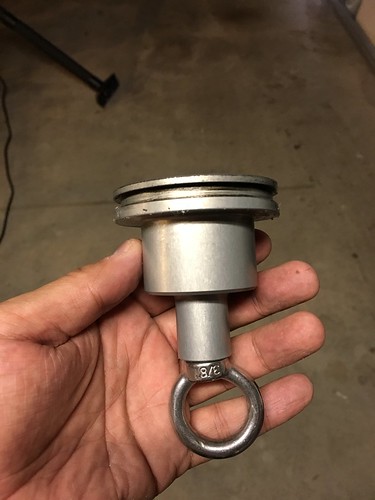
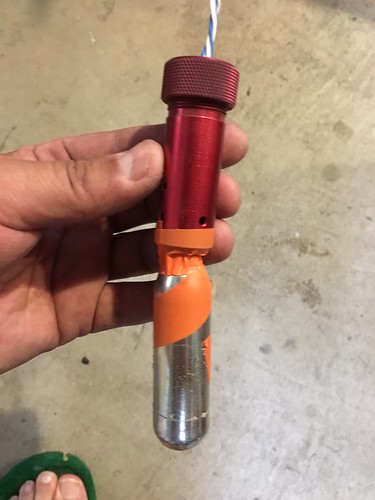
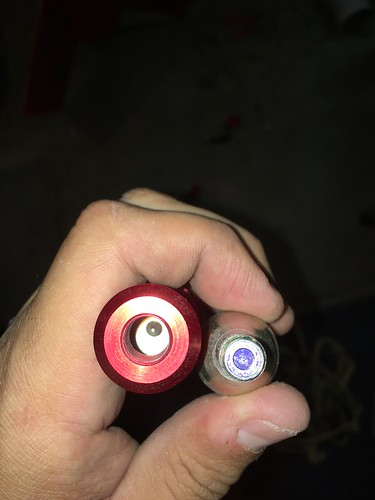
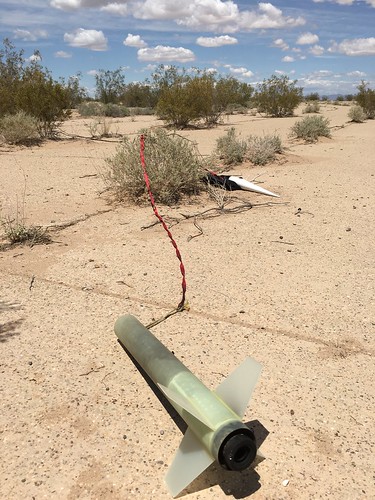
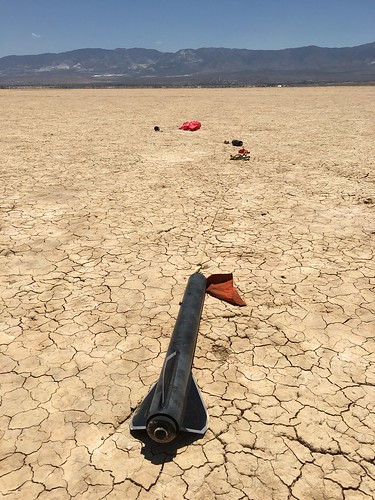
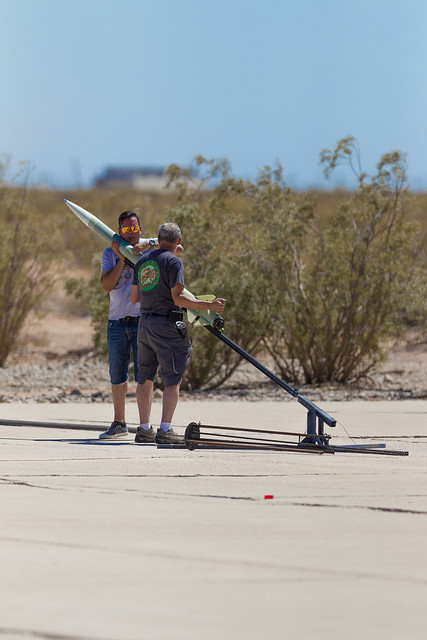
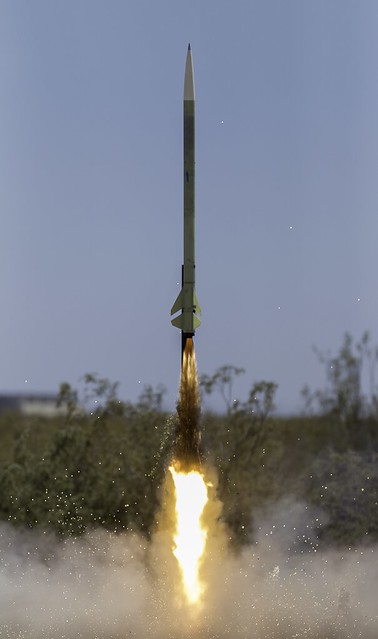
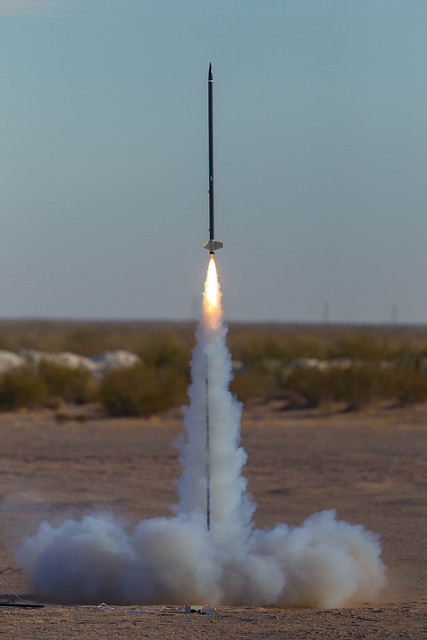
I didn't feel like packing that morning but, rather than shirking all responsibility, I elected to throw the trusty 2.6" Madcow Nike Smoke and minimally supportive gear in the car. I also had that CTI/AMW 542I297 Skidmark that failed to fire in DRM mark II at LDRS so that was handy for this robust, 38mm-motor-mount beastie. Finally, and most importantly, I wanted to test the Jolly Logic Chute Release gifted by my parents in September. That site link covers the device thoroughly but this small, non-pyrotechnic parachute tether will now figure prominently in my electronics arsenal. I somehow failed to secure liftoff video or photos but will attest to the perfection of the flight and single-volume, dual-deploy recovery. Here are the other photos I captured that day as already shared with the Tripoli SD email distribution. Oh and it's quite a rare bonus that I missed landing on the runway by about 8 feet this time:
I think I set the device for 500' to unbind the parachute but it looked more like 200' to me. Next time I'll try 700-800' and see how that looks. Note that Holtville is very close to sea level so this wasn't an MSL/AGL disagreement. In summary: git one and git 'er done, 'Merica!
Friday, November 25, 2016
Thursday, November 24, 2016
https:// connections recommended, cookies used here, daily puppy no longer being updated
From Blogger:
Your HTTPS settings have changed. All visitors are now able to view your blog over an encrypted connection by visiting https://hawtakshun.blogspot.com. Existing links and bookmarks to your blog will continue to work. Learn more.
And:
European Union laws require you to give European Union visitors information about cookies used on your blog. In many cases, these laws also require you to obtain consent.
As a courtesy, we have added a notice on your blog to explain Google's use of certain Blogger and Google cookies, including use of Google Analytics and AdSense cookies.
You are responsible for confirming this notice actually works for your blog, and that it displays. If you employ other cookies, for example by adding third party features, this notice may not work for you. Learn more about this notice and your responsibilities.
So... are cookie notices working for EU visitors? PSA: Don't get cookies in your sand. (That's a joke EU visitors. :)
Finally the "Daily Puppy" widget will no longer be updated so I have removed it. I'm sad as that's the only reason I even bother to check this dumb, rocket-sciencey blog. :(
Sunday, November 20, 2016
Belated: LDRS - June 2016 launch report
I haven't felt much like blogging in recent months. Could you tell? Well I'm attempting to catch up now so I suppose that's something... onward and upward.
Skidmarks remain my personal motors of choice for this clustered/air-start vehicle so I stocked up on a central 2304K815 as the ground-start motor. As always I got the thing moving up and away with this single motor before attempting to ignite subsequent motor pairs. Once off the ground I use both Raven 1 and Raven 3 altimeters in series to theoretically fire 2x 543I297 then 2x 305H226 then 2x more 305H226. For this third flight I set the air-start delays to 0.1s to maximize seamless titanium amazingness but noted two problems: 1) Only one of the I297s fired and 2) The gaps between motor pairs was more like 1-2 seconds. I still have no idea what happened with the I297 pair's delay since the capacitor should have been fully charged at that point but all the other motors fired at some point. If you look at the graph links below you'll see that the second pair of H226 motors were staggered unintentionally. Also the missing I297's ematch had fired so I suppose this was a rare time when a pyrodex pellet missed its spark:
Here are the data from the altimeters and both four-phase (really 5-phase) graphs look quite interesting (average altitude: 4,925' AGL) :
Oh and I forgot to mention that deployment bags rock! The previously documented damage to DRM mark II was cause by an unnecessarily steep launch angle mandated by the RSO. I was not interested in a second set of repairs and remembered that I have a couple of Rocketman deployment bags in storage. I used to think of them as parachute blast protectors back when I was using black powder for direct ejection. I have since moved all my large rockets to the CD3 CO2 system so melting/burning is no longer an issue. Remember that the primary function of a deployment bag is to gradually and gently allow a parachute to inflate thus eliminating the shock of unhindered inflation. I'm happy to report that zero incremental damage was done to my semi-fragile repairs on this flight so I'm all over deployment bags once again.
I had planned a second flight but, despite significant amounts of work on the Madcow Rocketry Mega Cowabunga, I could not pull that one together. Thanks for hanging in despite the protracted gap.
LDRS was conveniently hosted by ROCstock.org at Lucerne Dry Lake this year in June. The San Diego club carved out a cozy little portion of the parking area a couple of rows back on the east side. East side represent! Mark Treseder was kind enough to shoot photos of the event using my camera and they're on Flickr if you'd like to glimpse into the recent past.
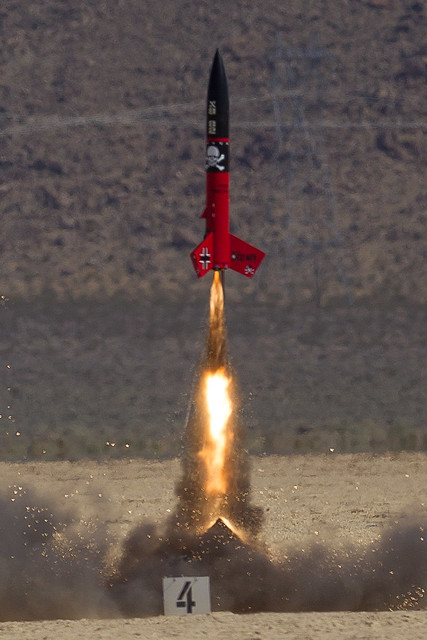
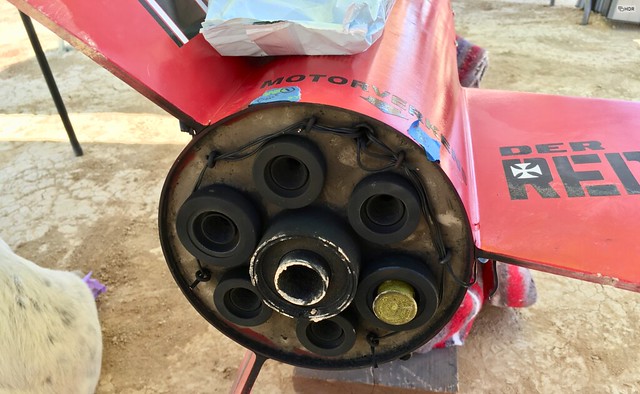
I've wanted to fly Der Red Mix mark II fully loaded for some years now and this third flight seemed like a great time to try. My aging Flip Mino HD's battery gave up the ghost unbeknownst to me until I was prepping the flight. As such I have only ground-based slow-mo and hand-held iPhone 6s slow-mo footie but it's still sort of a good time:
You might recall that I took some airframe damage at the top of the tube, patched that at home, then spent literally hours on the playa sanding the tube interior and nose cone shoulder trying to make the nose cone fit. In the end I got close enough but still had to use 2" wide Gorilla tape to create a gap at the top of the shoulder so the base would fit and move properly during ejection. You can see the [tape] gap between the two 8 decals in this liftoff shot, That did, however, shift the CG north a bit thus adding bonus stability margin (Photo Mark Treseder):
Skidmarks remain my personal motors of choice for this clustered/air-start vehicle so I stocked up on a central 2304K815 as the ground-start motor. As always I got the thing moving up and away with this single motor before attempting to ignite subsequent motor pairs. Once off the ground I use both Raven 1 and Raven 3 altimeters in series to theoretically fire 2x 543I297 then 2x 305H226 then 2x more 305H226. For this third flight I set the air-start delays to 0.1s to maximize seamless titanium amazingness but noted two problems: 1) Only one of the I297s fired and 2) The gaps between motor pairs was more like 1-2 seconds. I still have no idea what happened with the I297 pair's delay since the capacitor should have been fully charged at that point but all the other motors fired at some point. If you look at the graph links below you'll see that the second pair of H226 motors were staggered unintentionally. Also the missing I297's ematch had fired so I suppose this was a rare time when a pyrodex pellet missed its spark:
Here are the data from the altimeters and both four-phase (really 5-phase) graphs look quite interesting (average altitude: 4,925' AGL) :
Oh and I forgot to mention that deployment bags rock! The previously documented damage to DRM mark II was cause by an unnecessarily steep launch angle mandated by the RSO. I was not interested in a second set of repairs and remembered that I have a couple of Rocketman deployment bags in storage. I used to think of them as parachute blast protectors back when I was using black powder for direct ejection. I have since moved all my large rockets to the CD3 CO2 system so melting/burning is no longer an issue. Remember that the primary function of a deployment bag is to gradually and gently allow a parachute to inflate thus eliminating the shock of unhindered inflation. I'm happy to report that zero incremental damage was done to my semi-fragile repairs on this flight so I'm all over deployment bags once again.
I had planned a second flight but, despite significant amounts of work on the Madcow Rocketry Mega Cowabunga, I could not pull that one together. Thanks for hanging in despite the protracted gap.
Sunday, July 31, 2016
M2080 recovery failure analysis - Part 2
Since I posted part 1 of the M2080 recovery failure report I have been in contact with Jeff Garvey at electricmatch.com. He's been very patient while I worked through his requested testing and here's what I emailed him today in its entirety:
*****************************************************************
Good afternoon, Jeff.
I just completed three phases of testing, fired a total of six M-teks with 7' leads, and added some knowledge but I still lack water-tight conclusions. As such I defer to your judgment on whether any form of warranty replacement is merited. I will post a version of this report to my blog and append the previous entry with a less certain conclusion in an addendum.
Thanks for your patience while I worked through this.
After the first test session on 7/10 I realized that the ARTS2 itself might not be working. Since the unit has already impacted the ground I can never know if it was defective (in terms of firing initiators) before the M2080 flight. I suppose it could have been defective but I never saw issues because there was always a Raven running independently next to it.
Today I'll try the following tests with the ARTS2:
*****************************************************************
Good afternoon, Jeff.
I just completed three phases of testing, fired a total of six M-teks with 7' leads, and added some knowledge but I still lack water-tight conclusions. As such I defer to your judgment on whether any form of warranty replacement is merited. I will post a version of this report to my blog and append the previous entry with a less certain conclusion in an addendum.
Thanks for your patience while I worked through this.
=G=
Executive Summary
While I cannot know if the impact damage of the previously failed recovery changed the ARTS2 altimeter, battery/ies, and/or initiators in question I have concluded that:
Experiments and Conclusions
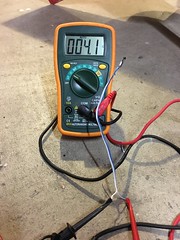
Part 1 - Initiator resistances (all in Ohms) as measured with an MN36 Autoranging Multimeter:
Box M1 - Box of (originally) 40 M-tek initiators with 7' leads purchased from electricmatch.com
1.5
1.3
1.4
1.6
1.2
1.6
1.3
1.4
1.3
1.3
Box M2 - Box of 40 M-tek initiators with 7' leads purchased from electricmatch.com
1.5
1.6
1.7
1.7
1.9
1.4
1.6
1.7
1.5
1.3
J D.R. - J-teks with 3' leads purchased from a third party solely for use in rocketry
1.8
1.9
2.3
3.0
1.7
J1 - J-teks with 3' leads purchased from a third party solely for use in rocketry
1.4
1.4
1.6
1.4
1.5
J2 - J-teks with 3' leads purchased from a third party solely for use in rocketry
1.4
1.4
1.5
1.5
1.5
Conclusion: With the exception of one J-tek at 1.2 Ohm all measure high relative to the spec.
Executive Summary
While I cannot know if the impact damage of the previously failed recovery changed the ARTS2 altimeter, battery/ies, and/or initiators in question I have concluded that:
- Both initiators connected to the low-altitude CO2 system measured high and well out of spec in post-mortem testing (3.5 and 4.1V, respectively). None of the initiators sampled from the same two boxes measured anywhere near that high. It seems unlikely that both were outliers in light of the population data so it's possible that the flight impact and/or post-mortem extraction might have changed their resistances somehow.
- Altimeter one, a previously reliable Featherweight Raven 2, likely functioned as expected during the flight so the failure to actuate the CO2 ejection system at ~800 feet AGL remains a mystery. After the impact a component separated from the board and that's the likely cause of its inability to fire initiators in test mode.
- I have [linked to] the Raven2's acceleration, current, and main/apogee voltage graph and it suspiciously cuts off at about 29 seconds into the flight. It appears that the altimeter fired the apogee channel successfully and was in the process of recharging the capacitor when the data cuts off. To my knowledge this has never happened before with Featherweight altimeters so it could have been impact damage to the memory, a battery failure, or other unknown factor.
- Altimeter 2, a Loki Research ARTS2, was unable to fire even nominally resistive M-tek initiators with a fresh 9V battery in single-battery mode. When I switched to the two-battery configuration both the apogee and main channels fired as expected. This leads me to think that this copy of the altimeter, unlike my previous copy, is incapable of firing initiators in single-battery mode.
Experiments and Conclusions
Part 1 - Initiator resistances (all in Ohms) as measured with an MN36 Autoranging Multimeter:
Box M1 - Box of (originally) 40 M-tek initiators with 7' leads purchased from electricmatch.com
1.5
1.3
1.4
1.6
1.2
1.6
1.3
1.4
1.3
1.3
Box M2 - Box of 40 M-tek initiators with 7' leads purchased from electricmatch.com
1.5
1.6
1.7
1.7
1.9
1.4
1.6
1.7
1.5
1.3
J D.R. - J-teks with 3' leads purchased from a third party solely for use in rocketry
1.8
1.9
2.3
3.0
1.7
J1 - J-teks with 3' leads purchased from a third party solely for use in rocketry
1.4
1.4
1.6
1.4
1.5
J2 - J-teks with 3' leads purchased from a third party solely for use in rocketry
1.4
1.4
1.5
1.5
1.5
Conclusion: With the exception of one J-tek at 1.2 Ohm all measure high relative to the spec.
*****************************************************************
Part 2 - 7/10/16 - Altimeter tests
ARTS2 test (used in M2080 flight with failed recovery)
9V battery voltage - 9.43V, single-battery mode
M-Tek box 1 = 1.7 Ohm match (second highest measured resistance)
Connected to software, fired main twice, but the match did not fire.
Switched to apogee, fired it twice, but the match did not fire.
Connected it directly to 9V battery and the match fired.
Software not firing channels in test mode so... ARTS2 dead after hitting ground? Before? [see conclusions from part 3 below]
Raven2 test (used in M2080 flight with failed recovery)
Freshly charge LiPo battery
M-tek box 1 = 1.9 Ohm match for main (highest measured resistance) and 1.7 Ohm for Apogee connected simultaneously.
Ran the launch sequence twice but neither match fired (apogee/main)
Raven3 test (control)
Would not initialize the test for some reason even with a fresh battery. After some research on the inter webs... It turns out that the Raven3 needs at least 3.85V at startup to initialize properly. This results in 4 high beeps then one low beep at startup. Once I used a new and freshly charged LiPo then even the 3.0 Ohm initiators fired properly. (I also learned that the altimeter can be powered up in any orientation and then moved to long-axis-vertical for flight readiness without powering down first.)
Raven1 test (control)
Using battery from last fight without refreshing the charge
Test initialized correctly and I watched as both the apogee and main matches fired on time from the sim. (flight counter 14)
*****************************************************************
Using battery from last fight without refreshing the charge
Test initialized correctly and I watched as both the apogee and main matches fired on time from the sim. (flight counter 14)
*****************************************************************
Part 3 - 7/31/16 - Explore the ARTS2 altimeter further
After the first test session on 7/10 I realized that the ARTS2 itself might not be working. Since the unit has already impacted the ground I can never know if it was defective (in terms of firing initiators) before the M2080 flight. I suppose it could have been defective but I never saw issues because there was always a Raven running independently next to it.
Today I'll try the following tests with the ARTS2:
- Single battery with lower resistance M-teks (1.3 and 1.4 Ohm, respectively).
- Dual battery with the same lower resistance M-teks (assuming they don't first in the first test).
- If neither test succeeds then I'll leave the board configured as in test 2 but swap in two J-teks from my stash and try again.
9V battery voltage, board and pyro power: 9.60V
Apogee channel: 1.3 Ohm initiator
Main channel: 1.4 Ohm initiator
Setup: beeps on power-up meaning both initiators were recognized. First attempt with board horizontal:
Test 2:
Apogee channel: 1.3 Ohm initiator
Main channel: 1.4 Ohm initiator
Setup: beeps on power-up meaning both initiators were recognized. First attempt with board horizontal:
- Apogee: No fire
- Main: No fire
- Apogee: No fire
- Main: No fire
- Apogee: No fire
- Main: No fire
Test 2:
9V battery voltage, board power: now 9.37V
9V battery voltage, pyro power: 9.63
Apogee channel: 1.3 Ohm initiator
Main channel: 1.4 Ohm initiator
Setup: Hooked up pyro battery, switched board to 2-battery config. Held board vertically on power-up and got the expected three beeps.
9V battery voltage, pyro power: 9.63
Apogee channel: 1.3 Ohm initiator
Main channel: 1.4 Ohm initiator
Setup: Hooked up pyro battery, switched board to 2-battery config. Held board vertically on power-up and got the expected three beeps.
- Apogee: FIRED!
- Main: FIRED!
Sunday, July 24, 2016
Building resumes
After losing my stalwart DarkStar I decided that I would not rebuild it. Instead I purchased a 4" Punisher w/75mm mount at LDRS and the booster is already built:
I really dig this volumetrically efficient design and hope it lasts for several years. Three years ago my parents gifted the now discontinued 8" Mega Cowabunga from MadCowRocketry.com. After barging toward LDRS the build was nearly complete. I had planned to finish it on Lucerne Dry Lake Bed and fly it on an AT L1500 Blue Thunder. Well it turns out that I had way more to do than anticipated and it wouldn't have been ready anyway. In the week after that launch I finally finished the build and it's now ready to go:
I was also able to rather easily modify the previously reported 7.5" ID 3D-printed electronics bay to fit the ID of this larger rocket (shown with one Power Perch base installed):
I also made some build progress on the 7.5" Skunkworks V2 w/75mm mount:
Those internal fillets are going to suck. I bought some industrial, arm-length gloves for the task and I suppose I could move into the business of artificial insemination of livestock afterward if I didn't love critters so much. They all deserve to live happy lives unhindered and unconsumed by our species. Finally, have you caught them all yet? Since I started Pokémon Go on 7/12/16 I have walked 68.57 miles in the real world and attaining level 20 offered quite the bounty!
Monday, June 27, 2016
[Updated] M2080 recovery failure analysis - Part 1
[Please see the notes in the entry in brackets, the addendum at the bottom of this entry, as well as part 2 of this report above this entry.]
This has been a rough entry to ponder but I need to commit to history and move on. In memorium... I had flown this Wildman Extreme DarkStar workhorse 10 times over the course of ~4.5 years before the April 2016 recovery failure at Holtville:
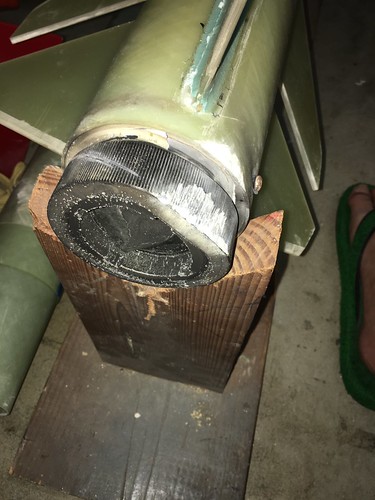
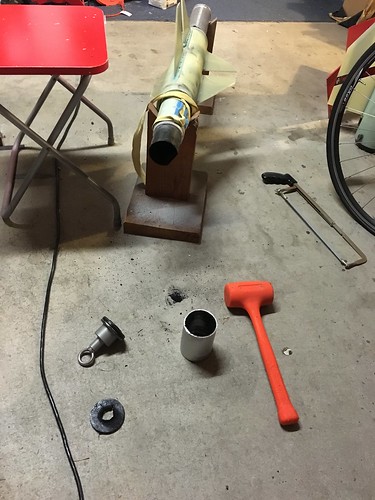
I had to saw the airframe off to try to get the bent casing out but no dice. After hacksawing off the forward end of the motor I discovered that the forward closure parts were dented and damaged beyond repair anyway:
Similarly the CD3 for the main compartment bent on impact such that the red anodized aluminum cylinder was totaled.
And this demonstrates that the 16g CO2 cartridge remained intact.The only elements that failed were both of the main Firewire Initiators. Did I mention that? Ugh.
Addendum: After additional testing at the request of the initiator vendor and considering that the system changed post-impact I can no longer assert that the matches were definitely to blame with any certainty. All I know for sure is that both initiators measured high and well out of spec for resistance after extracting and measuring them post-mortem (3.5 ad 4.1 Ohms, respectively). See part 2 of this report above on 7/31/16 for details.
This has been a rough entry to ponder but I need to commit to history and move on. In memorium... I had flown this Wildman Extreme DarkStar workhorse 10 times over the course of ~4.5 years before the April 2016 recovery failure at Holtville:
- L585 Imax - Sept. 2011
- M840 White long-burn - Nov. 2011
- L1410 Skidmark - April 2012
- L851 White - June 2012
- M1675 Pink -Jan. 2013
- M2045 Blue Streak - Oct. 2013
- M2245 Imax - Nov. 2013
- M3700 White Thunder - Feb. 2015
- M3100 White Thunder - June 2015
- M2080 Skidmark - April 2016
The recovery recipe I used for the first L585 flight remained consistent and served me well up through the M3100 flight. The only difference in the setup for the most recent M2080 flight was the use of M-tek/Firewire electric matches (blue&white-striped leads) rather than J-teks (solid yellow or black leads). To my knowledge J-teks have never failed in any of my flights. I should note that at least one of the two Firewires used for apogee/CD3 deploy worked as the drogue was out but... Despite using separate, heterogeneous, redundant altimeters neither of the M-teks used in the main parachute's CD3 system fired as you'll see below. For the record the Raven 3 used a freshly charged LiPo battery and the ARTS2, set for single-battery mode, used a fresh 9V battery.
According to their website these Firewire Initiators should measure 1.0 +/- 0.2 Ohm:
Here I'm disassembling the CD3 system for the first time after impact:
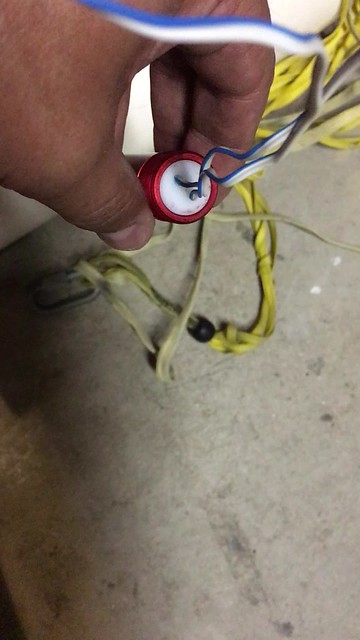
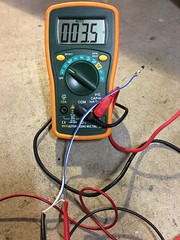
After dissecting the nearly totaled rocket I tested the intact matches and both measured high for resistance; 3.5 and 4.1 Ohm, respectively:
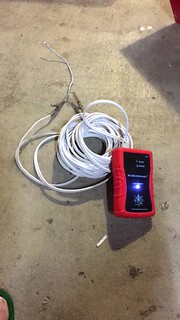
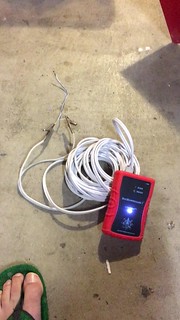
I also fired both matches with my ground ignition system after measuring their resistances so I remain thoroughly stumped. Click to play these videos:
I had heard that there were issues with early batches of these matches but I ordered two boxes with 7 ft. leads (40 per box) directly from the vendor on 12/17/2015. I see no lot code or batch date on either box [lot numbers are on the underside of the taped lid but I had only been accessing them from the sides of the boxes and I shared them with the vendor] so I have no idea how to identify these except for the order date. That's all I think I know except for sadness. After colliding with the sturdy concrete, nozzle-first, I was only able to salvage one Pro75 threaded closure, the ARTS2 (I think it still works?), the Raven 2, and my Beeline GPS tracker. If I were to replace all that I lost it would run a hefty toll, $850, + shipping:
I highly recommend that folks not use that product for recovery. [Instead just be sure to test the initiators for resistance and verify that they work with your electronics.] I will [likely] only use the remainder of those two boxes for ground ignition where failure is an option. Behold the carnage:
Direct impact on concrete with only a small drogue parachute.According to their website these Firewire Initiators should measure 1.0 +/- 0.2 Ohm:
Here I'm disassembling the CD3 system for the first time after impact:
After dissecting the nearly totaled rocket I tested the intact matches and both measured high for resistance; 3.5 and 4.1 Ohm, respectively:
I also fired both matches with my ground ignition system after measuring their resistances so I remain thoroughly stumped. Click to play these videos:
I had heard that there were issues with early batches of these matches but I ordered two boxes with 7 ft. leads (40 per box) directly from the vendor on 12/17/2015. I see no lot code or batch date on either box [lot numbers are on the underside of the taped lid but I had only been accessing them from the sides of the boxes and I shared them with the vendor] s
- Extreme DarkStar - $306
- Pro75 6GXL full motor assembly - $414
- RouseTech CD3 Adventurer System - $130
I had to saw the airframe off to try to get the bent casing out but no dice. After hacksawing off the forward end of the motor I discovered that the forward closure parts were dented and damaged beyond repair anyway:
Similarly the CD3 for the main compartment bent on impact such that the red anodized aluminum cylinder was totaled.
And this demonstrates that the 16g CO2 cartridge remained intact.
Saturday, June 4, 2016
Holtville launch report for 5/7/16
Brevity remains inevitable here as I had only one flight but here are the photos captured by Mark Treseder and myself. Here's the one GoPro vid I captured of Mark Treseder's Little John on a CTI 396I195 Red Lightning:
I flew only a CTI 538I303 Blue Streak in the 2.5" Nike Smoke, for which I captured neither liftoff photos nor video. I did, however, manage to record yet ANOTHER fucking runway landing marking this an unfortunate recovery two months in a row:
This time damage was negligible but... really? I know I must attribute this to dumb probability but my rocket array won't survive much more of this concrete that acts like a fiberglass magnet. Ugh. I need a napping Lola to cheer this post up:
Sunday, May 15, 2016
Lucerne... Punisher... K1440... redemption!
I'll augment this entry soon but here's the video of yesterday's K1440 flight to 13,932' with full recovery:
My trusty Comm-spec tracking system led me to it but only after seeing nothing after burnout, walking several minutes North in marginal disbelief, and finally catching a glimpse of red 'chute. Here's the view back toward the flight line ~1 mile South (shocker!):
Here's the flight data from my new Raven 3 (70G/30G):
- Tabular, graph
- Barometric altitude: 13,808'
- Max velocity: 1,297 MPH
- Max axial acceleration: 62.5 Gees (!!)
Good times. I bought a CTI 2014K1200 White Thunder from the epic David Reese at Wildman West for another good time soon.
Friday, May 6, 2016
Holtville - April 2016 launch report
In looking at my todo list in the entry below I must admit I recall little from the February launch but I remember much about last month's launch. Here are a few photos of Ron Rickwald's M flight, my M2080 Skidmark, and Larry Hermanson's L1000. Thanks to Mark Treseder for shooting the away photos. And here's the GoPro vid of Ron and my flights:
In honor of Mike "Sparky" Jerauld's lengthy service to the DART club many folks flew Skidmarks, Dark Matters, or Metalstorm motors. I elected to bust out the CTI Pro75/6GXL 6827M2080 Skidmark purchased during last fall's Wildman sale. As always the prep took much of the morning but I felt good about the setup. Thanks to Darrel for helping out at the pad and that was a fine, joltingly quick liftoff:
Mark Treseder later shared that he thought the motor had cato'd but I had used the stock CTI igniter and I'm guessing it was the high aspect ratio, 7G motor that caused the quick pressure up. I never saw it after burnout but had GPS lock from about 14,000 feet until it landed. Later Darrel and I drove right up to it on the concrete runway about three feet North of the dirt. It was clear that the apogee ejection had worked but there had been no main ejection at 800 feet. Having flown this rocket based on a recipe that had served me well for about nine flights I was shocked and saddened at the recovery failure. I forgot to shoot a photo but the booster was on the runway painfully close to the dirt (which would have saved it) and the payload section was in the dirt. I'm guessing that the payload section had bounced off the concrete, however, as it's nearly totaled as well. The booster clearly landed at an angle as the AeroPack motor retainer has a huge dent in it, the epoxy sealing the retainer in is mostly fractured out, and I can see that the casing itself is dented. I will publish a separate entry on the failure analysis but I'm quite certain the new M-tek 'initiators' are to blame. Kenny Harkema spoke to the folks at electricmatch dot com and they told him there was a defective batch of pyrogen material for these new matches. Friggin' sheer awesomeness. I should note that their J-teks have never failed me.
The flight had sim'd to 14,800' AGL. I still need to pull the ARTS2 data but the Raven 2 and Big Red Bee Beeline GPS appear to have survived the impact:
- [Addendum] ARTS (graph, tabular, motor performance (7192M2197), CD)
- Baro altitude: 14,263'
- Max velocity: 1,510 fps (1,029 MPH)
- Max acceleration: 657 ft/s^2 (20.5 Gees)
- Raven2 (graph, tabular):
- Baro altitude: 14,281'
- Max velocity: 956 MPH
- Max acceleration: 29.1 Gees
- Beeline GPS (Google Earth screen grab)
- Max altitude: 4,513m AGL => 14,803'
- [Addendum] Averages:
- Altitude: 14,449'
- Velocity: 993 MPH
- Acceleration: 24.8 Gees
Tomorrow's Holtville launch will be small but I'm gonna head out anyway in search of better luck. Wish that for all of us. Thanks for reading.
Saturday, April 9, 2016
SLOWER!!
Hi, all.
Sorry for the lag but I've been in Swift/iOS app programming mode for work since January so XCode overrides blog authoring time when I return home. I had planned to attend Lucerne today but it was cancelled due to inclement weather. I vow to catch up soon and owe:
- February Holtville launch report
- 3D printing update
- April Holtville launch report including a special failure analysis focus. Grrrr....
Thanks, onward, and upward!!
Saturday, January 9, 2016
K185 = cable cutter test
I got a late start during last Saturday's packing because I could not find three important items and arrived at Holtville about 9:30AM. The AT 1417K185 did indeed fly...
...but there were several issues during prep and the primary reason for the flight, the cable cutter test, failed. This was the first flight of what was supposed to be a super robust, carbon-fiber-overlaid, minimum diameter 54mm design. I built this very high aspect ratio rocket to take any 54mm certified motor but the K815, while cool, would not be pushing any aerodynamic limits that day.
I specifically designed and 3D-printed the black caps [below] to fit in this rocket's electronics bay and cut a length of 1/4-20 all-thread that morning to hold the caps in place. However, upon assembly, I discovered that the all-thread rod was ~2" too short. I still have no idea how that happened as I'm somewhat familiar with ruler use. I was about to give up but this was my only planned flight for the day so I quickly decided to shorten the already too long coupler to fit the all-thread assembly. I bought a DC Dremel tool and that made quick work of the modification.
So now everything fits together as originally planned and the rest of the prep goes relatively smoothly. The booster segment is only 36" long so a K185 with even a shortened coupler doesn't leave much volume for the recovery goods. With Darrell's help I was able to get everything packed in and two pieces of masking tape seemed to hold the payload section into the booster.
Out at the pad I armed the Raven 3/Power Perch with the large magnet but rather than the expected "high high low low" dual-deploy beep pattern Darrell and I heard only "low low low pause high" (I think). I admitted that I had not powered up the altimeter after prep as a test but this setup always works as expected so I had become overly confident. In any even we agreed that something was wrong and pulled the rocket. We undid all the careful packing work and checked the connections only to hear the same odd pattern after several iterations. Once again I had planned to scrap the flight... defeatist! Coincidentally I started talking to Russ Sands afterward who offered that it sounded like my LiPo battery below a safe voltage threshold. I always charge my batteries the morning of a flight so I was skeptical but swapped to a different battery anyway. Lo and behold it powered up with the expected dual deploy beep pattern! Well done, Russ, and thanks for the input. I'll need to charge and test all my Raven batteries before the next launch.
OK so I crammed everything back together, got the rocket on the rail, armed the Raven 3, and loaded up the stock AT igniter. Darrell was kind enough to launch for me but there was no ignition on this first try. I've always found these Aerotech 54mm moonburners difficult to ignite and should have proactively metered some thermite. Instead I used one of my older, dipped igniters on the second try. There was a small puff of smoke upon ignition and then about 10 seconds of smoldering before the motor finally pressured up. I was a bit worried about the moon burning thrust vector and minor curvature in the 4' long payload section but did everything I could to balance those forces during prep. Ultimately the ascent was straight, true, and out of sight. I used a 12g CO2 cartridge at apogee so there was no visible event at the top. Luckily the Comm-Spec tracker signal boosted once the antenna was free from the carbon fiber shell so I knew I had separation. Darrell and I walked right up to the rocket about 1/3rd mile away using the tracker. Everything had separated but the main parachute's "burrito" remained intact with the cable cutter still in place. D'oh!
I suspect that some of the BP leaked out of the cutter's cylinder despite a relatively thick wire to the ematch. I had used a sealing o-ring around the wire in the previous night's test but it didn't seem to fit over the black wire I used for the flight. Just in case I had plugged the cap with wall-tack clay but apparently that didn't help. I suppose I'll force the o-ring over the wire next time and the new MTek leads are of apparently smaller diameter.
The bottom ebay cap had hit the ground and cracked another inch off of the coupler despite internal carbon fiber reinforcement. This impact also knocked the baro sensor off the Raven 3 and I have yet to be able to power it back up. I might try to have it fixed but, with two abusive flights on it, the unit could be dead. Good rocket science-y times!
Friday, January 1, 2016
Some 3D printing success
Over the holiday break I got my CreatorBot 3D printer up and running again and completed the following in the last few days:
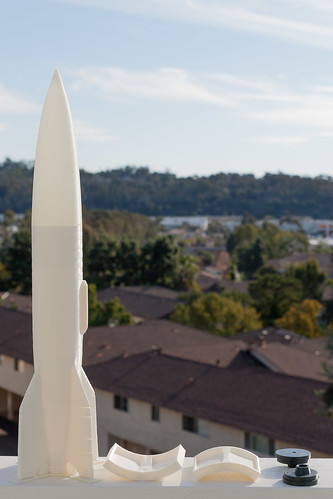
On the left is the 3D V2 mark II with numerous improvements over my first design. Unfortunately I still haven't built a lid for this large, open-top printer and you can see several warp/layer splits in the fins. I can patch that before flight and the mark III should benefit from a laser-cut lid.
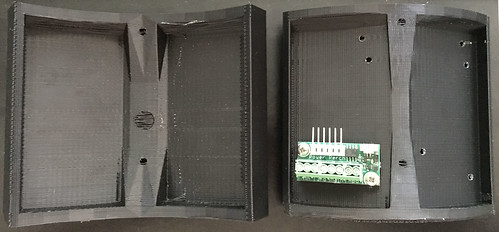
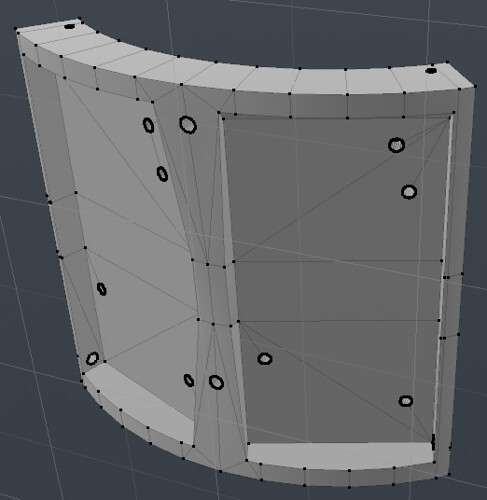
The middle two pieces represent my electronics solution for the Polecat Aerospace 7.5" V2 with 75mm motor mount in progress. Before this design the two leading choices were to cut an door out of the airframe (not a fan) or add an E-bay tube in the nosecone tip. The new alternative is to mount two Raven Power Perches into the smaller half and bolt that to the larger half in contact with the ID of the airframe. There's a 3/8" static port to the outside, two 1/8" side outlets for ematches, and two top holes for screw eyes to minimize stress on the Power Perch's wire mounts. I also increased the radius of the smaller half slightly so the bolt's threads will be loaded under a bit of force to prevent vibrational unthreading of the nuts. I may be able to refine the design some but this first one seems like it will do the trick. Here's the smaller half model detail:
Finally the two black ebay caps on the right are prints I completed at work on our Makerbot 2X. I've been getting some very clean prints on the 2X lately as I added 4 mil thick Kapton tape to the heated bed and increased its bed temperature to 120˚C. This mostly eliminates warp with ABS and gives a highly uniform glossy finish to the base of the part(s). These caps will enable the aforementioned minimum diameter K185 flight tomorrow at Holtville. I'll reiterate that every high-power rocketeer needs a 3D printer and a modicum of modeling/CAD skill!
Subscribe to:
Posts (Atom)