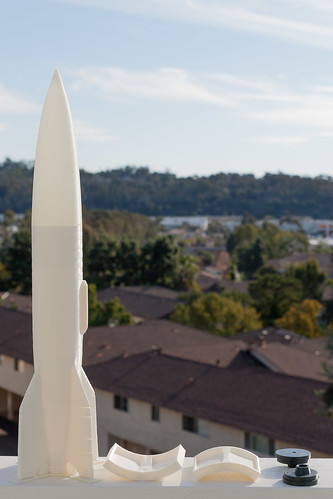
On the left is the 3D V2 mark II with numerous improvements over my first design. Unfortunately I still haven't built a lid for this large, open-top printer and you can see several warp/layer splits in the fins. I can patch that before flight and the mark III should benefit from a laser-cut lid.
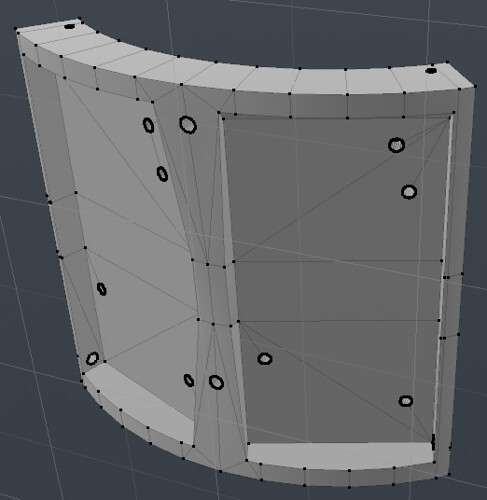
The middle two pieces represent my electronics solution for the Polecat Aerospace 7.5" V2 with 75mm motor mount in progress. Before this design the two leading choices were to cut an door out of the airframe (not a fan) or add an E-bay tube in the nosecone tip. The new alternative is to mount two Raven Power Perches into the smaller half and bolt that to the larger half in contact with the ID of the airframe. There's a 3/8" static port to the outside, two 1/8" side outlets for ematches, and two top holes for screw eyes to minimize stress on the Power Perch's wire mounts. I also increased the radius of the smaller half slightly so the bolt's threads will be loaded under a bit of force to prevent vibrational unthreading of the nuts. I may be able to refine the design some but this first one seems like it will do the trick. Here's the smaller half model detail:
Finally the two black ebay caps on the right are prints I completed at work on our Makerbot 2X. I've been getting some very clean prints on the 2X lately as I added 4 mil thick Kapton tape to the heated bed and increased its bed temperature to 120˚C. This mostly eliminates warp with ABS and gives a highly uniform glossy finish to the base of the part(s). These caps will enable the aforementioned minimum diameter K185 flight tomorrow at Holtville. I'll reiterate that every high-power rocketeer needs a 3D printer and a modicum of modeling/CAD skill!

1 comment:
Try printing this with eSun ePC. Not cheap stuff ($26/0.5kg), and you must be able to print at 255C-260C and with a 90C-100C bed, but I guarantee you will get a stronger and better-looking print with less shrinkage and better layer adhesion than you ever could with ABS, and the heat tolerance of the part will be as good and probably significantly better. Does not require any sort of enclosed volume.
I've never seen a filament like it. You'll save money in the end. Trust me on this. It's my new favorite stuff.
Bill Cook
Mayhem Rocketry _/)_
Post a Comment