
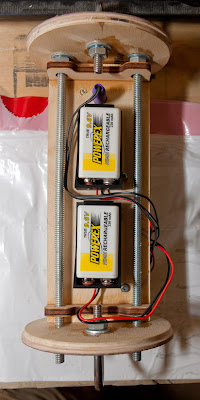
On the top-most image at top right is a Featherweight Parrot 2 altimeter. This is an unbelievably capable device and this will be the first time I've used it. On the lower left is my trusty ARTS2 altimeter and there are three total 9V battery mounts as well.
I should also note that I had a design epiphany during a meeting this morning... I always struggle with the best way to mount external switches to arm the electronics in a vertical position. Every hole you drill or slot you cut has the potential to weaken the structure under potentially tremendous flight forces.
Both altimeters use barometric sensors to determine altitude over the course of the flight and descent. Therefore you must drill a static port (hole) to allow access to external pressure. I calculated that I needed a single 1/4" diameter hole to ventilate the bay. I then carefully mounted the screw switch for the ARTS2 at top center of the sled aligned with that static port. I also positioned the side-mounted arming button for the Parrot 2 right next to the screw switch (mostly obscured in the photo). Now all I need to do is place a skinny screwdriver into the static port, screw the switch down to turn on the ARTS2, and then track right to push the button on the Parrot2 and arm that device. Nice!! One hole serves three purposes. Heh heh. And I have no external switches or extra weak spots!! Ist fantastisch!
Finally I wanted to strengthen the thin plywood caps so I simply laid out two circles of carbon fiber/Kevlar fabric on polyethylene film, saturated them with 15 minute West Systems epoxy, placed the caps on the fabric discs, overlaid another layer of polyethylene, and placed a 10 pound weight on top. Once cured I end up with a super smooth, glossy composite reinforcement on each cap:


No comments:
Post a Comment