For the second time I'm reminded that the yellow cross-linker included with the UV Smooth Prime product has a maximum shelf life of only a few months. On Friday I opened the little jar to find a rubbery solid therein. The white primer itself seemed fine so I rolled the dice and slathered it on Der Red Mix mark II anyway. Over the course of sanding for an hour today I noticed several spots where the dried primer was flaking out of the tube seams. I'd never seen this before with cross-linked primer so lesson learned: Use that $51 can of product quickly!!
They really should sell the cross-linker separately because of the aging difference of the two parts. In order to finish this rocket by Thursday I'll need to drive up to Aircraft Spruce in Corona tomorrow to buy another can. Hopefully they'll sell me a spare jar of yellow failure. Good... traffic... times.
Sunday, October 31, 2010
Sunday, October 24, 2010
Improvement via iteration...
I hate crashing expensive, time-consuming rockets but there is one advantage: the same design turns out WAY better the second time. I wasn't very happy with the carbon fiber fin reinforcement on Der Red Mix last time because the fabric texture was pronounced, I had to pry the fins apart after they'd cured, and, of course, the carbon/kevlar hybrid was impossible to sand.
While 1/4" plywood is pretty rigid I still wanted to add some cloth reinforcement because the fins are high profile and I don't want them shredding or breaking off during flight or recovery impact. Last time I used a mix of carbon fiber cloth and remnants of carbon/kevlar cloth. I also used a material-efficient stack while laminating but it's that configuration that caused the fabric bumping and layer separation difficulty:
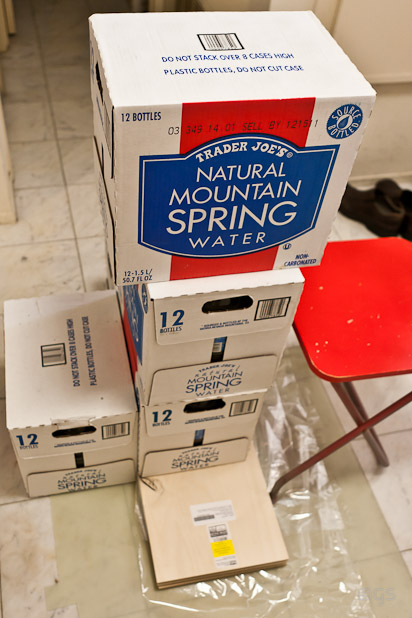
For this mark II build I decided that carbon fiber was overkill so I reverted to 6 oz fiberglass. I also added 3/8" ply layers between the fin layups to force a smoother surface and to completely segregate each stack for easy separation ('CF fabric' below should read 'Fiberglass cloth'):
This layup worked much better although the surface still isn't as smooth as I'd like so, again, priming/sanding is the best!! Here are some pix of the layup:
Oh and I completed the motor assembly/e-bay, cut all the slots and doors, epoxied the goodies together, and this baby is ready for fins:
Tuesday, October 12, 2010
Build progress update
Der Red Mix mark II suffers only from a lack of motivation. I am making progress and the build is far smoother the second time but, honestly, I should have been done by now. Here's the upper portion of the motor tube assembly with the e-bay door. I propped it upside-down in the airframe tube whilst it cured:
I'm also making marginal progress on the >2000MPH rocket. I completed the carbon fiber reinforcement of the coupler and grafted 12" of BlueTube 2.0 on the booster to fit the payload coupler and recovery system:
Plaster City... The DARK launch
No not a night launch... Last weekend it was thunderstorming in the east and the sky was supa dark so I bought an M795 reload for this year's M-moonburner-drag-race, tied KO in an I445 drag race, then high-tailed it outa there before my car got stuck in ex-lakebed sludge:
Monday, September 27, 2010
Sunday, September 26, 2010
After 5+ hours of arduous construction today...
...I completed the following:
- Der Red Mix mark II - cut, sanded, and JB Welded retainers to all motor tubes. Drilled and marked all centering rings and attached U-bolts to top centering ring. Epoxied top centering ring assembly onto 54mm central tube as a carefully aligned datum for the remainder of the complex motor assembly. Cut and sanded the electronics bay coupler.
- 2000 MPH design - cut and sanded booster extension tube to accommodate 34" motor casing. Trimmed excess carbon fiber from interior of coupler.
- Half-a-Vertical-Assault - This is the kit bash for which I designed the e-bay in the 3" nosecone. I got the motor/fin can assembly started today. This bonus design should complete fairly quickly as I won't need to reinforce the Blue Tube 2.0 airframe.
Starting is the hardest part so I'm moving again. In addition to the above I also need to rebuild the electronics bay for my 54mm minimum diameter and build another custom booster for the same.
Saturday, August 21, 2010
On the mend
So I've now overcome the sadness of Der Red Mix and embarked on DRM mark II:
- Last night I think I thoroughly mastered both the Parrot2 and Raven altimeters via manuals, testing, and marking of the terminals. I will not repeat my mistakes of last Saturday.
- I decided that DRMII will use all BlueTube 2.0 rather than phenolic and just ordered four tubes. This should greatly improve strength overall and will reduce my finishing time demonstrably over mark I.
- I made some small positional adjustments to the mark II design in RockSim as refinements. I think I'll need less nose weight this time for a typical flight.
- In mark II I can revert to the original position of the Flip video cam cowling so there should be no fin visible this time.
- I'm considering cutting my own fins and centering rings this time but might still go with laser cutting at BMS. TBD.
- I'll combine some of Kurt Gugisberg's painting advice with a new support rig I've devised to minimize dust kickback. Hopefully I can avoid car paint pitting this time. I'll also apply the decals before flying to underscore confidence in my revised approaches.
Cathartically this rebuild is now more important to me than attempting 2000MPH at Plaster Blaster in November. Also I just bought my own Pro75 6G hardware set for that flight but I wanna put some miles on that casing elsewhere first. Oh and KO sent her shot of the DRM fail. It better shows how the Flip camera landed safely:
Wednesday, August 18, 2010
Lucerne, 8/14/10 - Der Red Mix FAIL on maiden flight
Let's start with the onboard video and then I'll explain:
First off can you BELIEVE my Flip MinoHD video camera survived that high-speed impact?! That has to be one of the few surviving onboard video accounts of a high-power rocket crash. Props, Flip!
OK so this was to be the maiden flight of my scratch-built, 7.5", clustered upscale of Estes' Der Red Max but cluster = Mix in my case. While I had access to 7 motor slots I wanted to walk before running so I chose to ground-start a CTI K500 Red Lightning, wait 1 second, then air-start 2 x I345 White Thunder motors. It shoulda kicked ass. However, operator error resulted in a great ground start, no air-starts, and no ejection of the main parachute at apogee. Jenius.
After the flight I downloaded the data from the Parrot2 and Raven altimeters from www.featherweightaltimeters.com. Those little devices never cease to amaze me as they're tiny yet record a large number of data streams at high temporal resolution. Nothing leapt out at me at first so I decided to e-mail the data to Adrian at Featherweight. SERIOUS props to him because, independent of his workload at NASA, he quickly responded that none of my four e-matches had shown continuity. Despite reading both manuals numerous times I'd made the following three mistakes:
- Raven - responsible for air-start ignition & main parachute ejection - This was my first time using the Raven. While I thought I understood the wiring of this device I had clearly allowed my familiarity with other altimeters to lead me astray. The 9V battery does not connect directly to the altimeter as in most other altimeters. Instead it's grounded in the altimeter but the positive lead is connected to one of each of the e-match leads and optionally through an arming switch. The other leads of the e-matches feed into the relevant output connectors in the terminal block. [Addendum: if not using an arming switch you can also gang the second e-match leads in the + terminal slot. I verified this with a test connection.] Lesson learned: RTFM ad nauseum!

- Parrot2 - backup altimeter for main parachute ejection - I lost my original Parrot2 (250G) model a few months ago in the J1520 minimum diameter flight. I was able to purchase an unused Parrot2 (70/30G) model from a fella on the forums. In re-reviewing the wiring diagram I mis-marked the power inputs for the 9V pyro battery so the thing was running solely on the LiPo battery the whole time. The apogee e-match never had a chance of igniting. I don't use separate arming switches so this wiring option consistently confuses me. Lesson learned: When in doubt get a second opinion.
- Finally I left the K500's motor ejection in place as a secondary backup for parachute ejection. I was so confident that one of two altimeters above would do the trick, however, that I didn't shorten the delay from 17 seconds to 14 seconds. Let me tell you that 3 seconds is a LOOOOONG time when a rocket is coming in ballistic! Lesson learned: When possible trim the motor delay to simulated apogee + 1 second.
Here are some other pix:


Oh and KO and I were finally able to run our "Squat redemption" drag race on matching CTI I140 motors:
I edged her 'Cheshire' out by a length but the the motors look slightly different to me. I bought them at the same time so I'm not sure what's up with that. I will say that it appeared to be a tie to me until I downloaded the photos.
Sunday, July 11, 2010
Lucerne launch report, 7/10/10
Yesterday started cloudy but windless on the lakebed. I quickly prepped my newly-stable Squat rocket for the drag race my friend KO and I had planned. She was stuck in traffic so I then prepped and flew my Dark Star Lite with the new CTI H410 Vmax motor. That thing is insanely fast!! The following two shots were taken 1/8th of a second apart at 1/800th of a second shutter speed. Note the excessive motion blur on the second shot:


And I've zoomed in on the very cool glow of the motor ignition here about one millisecond after ignition. Vmax propellant is very efficient and barely visible were it not for the blast plate accumulation:
KO finally overcame the ridiculous I-15N traffic and prepped her Cheshire-style Squat. As I mentioned in my LDRS report below these kits are unstable with 54mm 1-grain motors unless one adds at least 8 oz of weight to the nose tip. KO and I used Crazy Glue's Plastic Fusion epoxy to bond the lead into the polyethylene nosecone. According to their claims this should have worked except that, as I we walked up to the RSO table, I heard a clunk and knew my weight had slipped out of the nose tip. For the second time I can't fly my damned Squat!! KO decided to fly hers on a CTI I140 Skidmark anyway in the hope that her nose weight would stay in place:


Well her flight started straight as you can see but then the weight slipped, the flight went unstable, and the rocket looped about five times before hitting the ground. Luckily she built hers well and it survived the impact with only cosmetic damage. Lesson learned: only the expensive 3M DP 8005 resin will truly stick stuff to polyethylene and polypropylene! You can use regular epoxy but you must use expanding foam to hold that mass in place. Stupid inert polymers!


And I've zoomed in on the very cool glow of the motor ignition here about one millisecond after ignition. Vmax propellant is very efficient and barely visible were it not for the blast plate accumulation:
KO finally overcame the ridiculous I-15N traffic and prepped her Cheshire-style Squat. As I mentioned in my LDRS report below these kits are unstable with 54mm 1-grain motors unless one adds at least 8 oz of weight to the nose tip. KO and I used Crazy Glue's Plastic Fusion epoxy to bond the lead into the polyethylene nosecone. According to their claims this should have worked except that, as I we walked up to the RSO table, I heard a clunk and knew my weight had slipped out of the nose tip. For the second time I can't fly my damned Squat!! KO decided to fly hers on a CTI I140 Skidmark anyway in the hope that her nose weight would stay in place:


Well her flight started straight as you can see but then the weight slipped, the flight went unstable, and the rocket looped about five times before hitting the ground. Luckily she built hers well and it survived the impact with only cosmetic damage. Lesson learned: only the expensive 3M DP 8005 resin will truly stick stuff to polyethylene and polypropylene! You can use regular epoxy but you must use expanding foam to hold that mass in place. Stupid inert polymers!
The wind started kicking up after noon but I prepped my bullet for an AT J340 Metalstorm flight anyway. This motor is Aerotech's first foray into sparky motors and they've elected to back the flaming titanium chunks with white smoke rather than black. They also demo'd their Skidmark equivalent called 'Dark Metal' at LDRS so those'll be cool. One can never incinerate too much loud, impressive elemental titanium in one flight. All of my flights seem to drift well beyond all others independent of wind level. Today, however, this particular flight landed within 100' of the pad and that's some serious luck!:

I also shot a few sequences with the intent of stitching together a virtual drag race in Photoshop. Normall I don't like sooty Blackjack/Smoky Sam motors but the wide-angle perspective of this frame intrigues me so I shared it in isolation here:

Finally Frank Hermes brought his dog River out so I could get my yellow Lab fix. He's a good buddy and I thank him for braving the 100˚F heat!


I also shot a few sequences with the intent of stitching together a virtual drag race in Photoshop. Normall I don't like sooty Blackjack/Smoky Sam motors but the wide-angle perspective of this frame intrigues me so I shared it in isolation here:

Finally Frank Hermes brought his dog River out so I could get my yellow Lab fix. He's a good buddy and I thank him for braving the 100˚F heat!

Subscribe to:
Posts (Atom)